You can see the trim for the sliding panels in this photo.
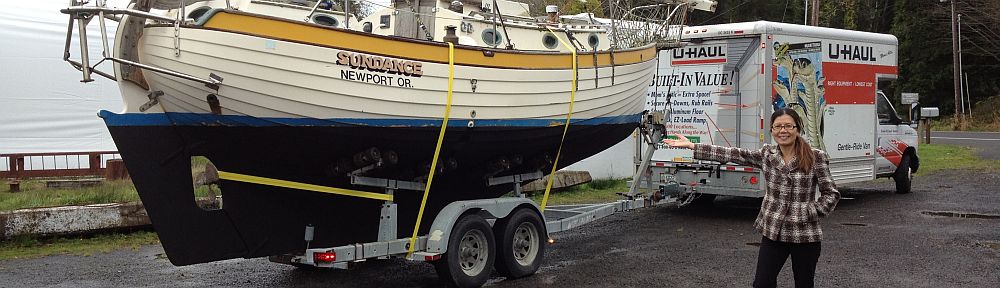
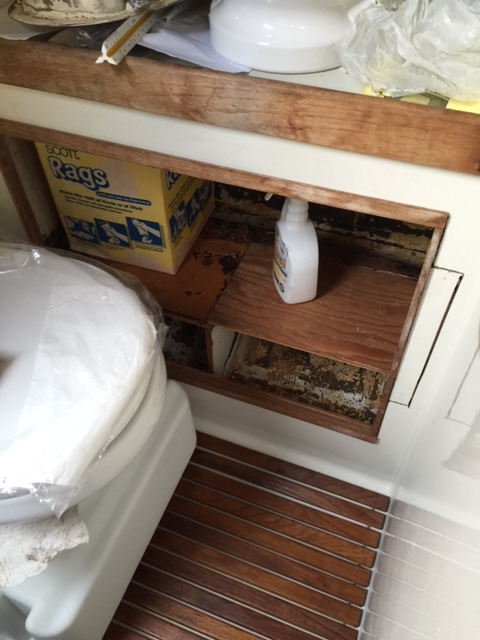
Continuing the renovation of this Nor’Sea 27’s head installation, I started work on the head locker, which consists of a 25×19″ cupboard with sliding doors. The prior owner had begun a modification to fit a 15-gallon polyethylene holding tank on in this locker, and he removed the doors and teak trim and cut a clearance hole in the side of the locker area. I am not sure how the weight of that tank would have worked out, but my plan is to install a Sealand M11 Marine Head with Holding Tank, so I won’t need to take up the locker with a tank. I may install a 6 gallon water heater in there later, but it won’t be anything that big and heavy.
When I cleaned out the boat I saved all the odds and ends, and luckily, I was able to locate the both trim pieces and sliding panel guides. One of the was slightly damaged, but I put that piece facing the away. The panel doors, however, were long gone. I did locate the missing piece of shower pan that had been cut out, and it had a reasonable fit except for the saw kerf. I plan to epoxy that bit back in place and fill the gap in the future.
 My original idea was to use some teak doors with rattan insert that matched most of the rest of the boat. I thought I could use that to create a nice sliding panel door, but I learned that the panel’s thickness was going to present some interesting challenges, because the two doors have to bypass each other, and the guide is only about an inch wide, so I abandoned that idea. I do still like the way it looks.
I knew I definitely didn’t want some flat white sliding doors because I think that’s against the character of the boat, but I did want to get something going, so I thought I would do my best to make some serviceable doors with the intent that I could always replace the panels later if I think of a way to incorporate the rattan doors or something.
I bought some inexpensive paneling to make the doors – I spent just $7 buying some luan plywood 2×4′ piece at Home Depot, and I found some brass door inserts at OSH.
Next, I cut a test panel to make sure I would be able to get the door panels installed in the finished opening. It didn’t need to be full width just tall enough to fit and be sure it would slide freely. The typical design for sliding bypass doors provides runners with a deeper guide on the top than the bottom guide so to be installed, the panel can be pushed up into the top slider with enough clearance to get past the bottom rails and seat into the lower channel. Then it drops down, leaving just enough height in the upper channel to retain the doors. I learned the ideal height was between 19-1/2 and 19-5/8″. The challenge was that my table saw has a 12″ width bed, so I made a remote fence using a stepstool to hold the fence in place.
I cut the two panels at 19-1/2 high and planned the width to have about 1″ overlap. That made each panel 13-1/2″ wide. I made sure to make my cuts to have the grain run vertically and use the best part of the wood.
I test fit the panels in place and it looks promising. We’re looking at what ultimately became the back of the panels. More on that soon.
 The next step was to stain the panels. A first I tried a dark stain, visible in the rear of the picture at left. It matched the teak but no one is going to be fooled into thinking that is teak. I’m much happier with the Colonial Maple stain in the foreground than the dark teak color on the rear.I originally tested some dark stain but frankly it was not very convincing so I went with a much lighter color to capture more of a knotty maple or pecan appearance.
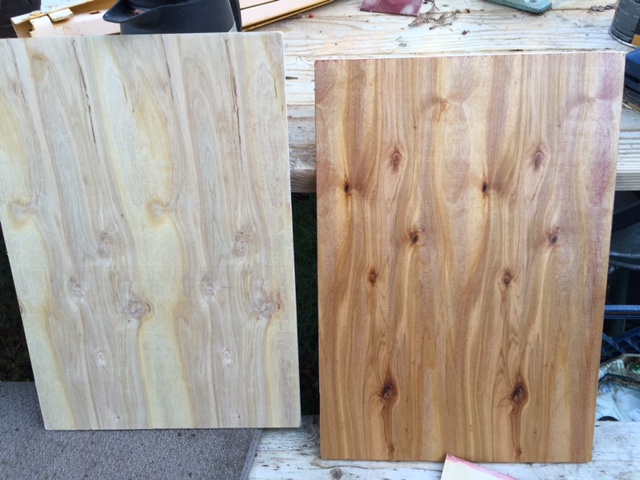 Stained on right, unstained on left. Originally I was planning to use the boring, back side of the panel, but when the stain hit these knots, I had to go with the gorgeous figured side.
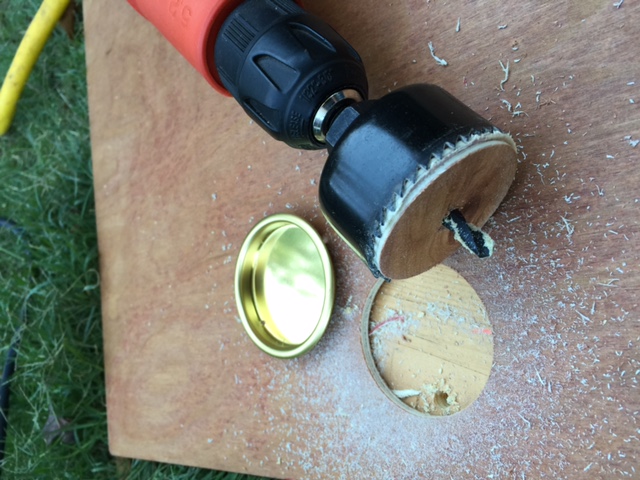 Finally I installed the door handles, which are closet-door style round brass inserts. It needed a 2-1/8″ hole so I made a trip to Harbor Freight, where I found a set for $10. Not the bi-metal kind, but fine for wood. I was careful to use a scrap of wood for a backer and cut halfway through the wood panel from each side.
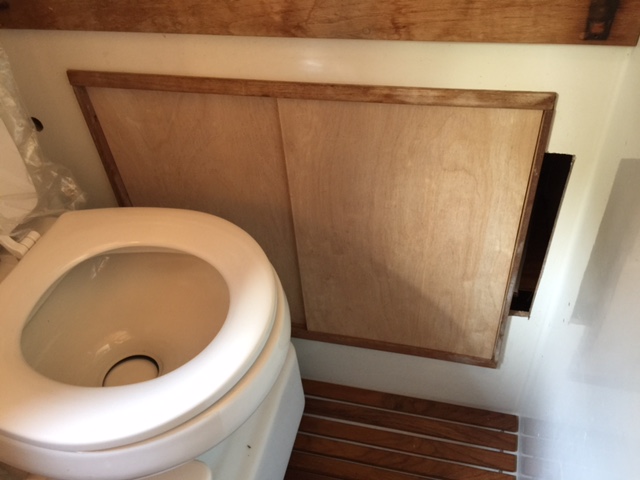
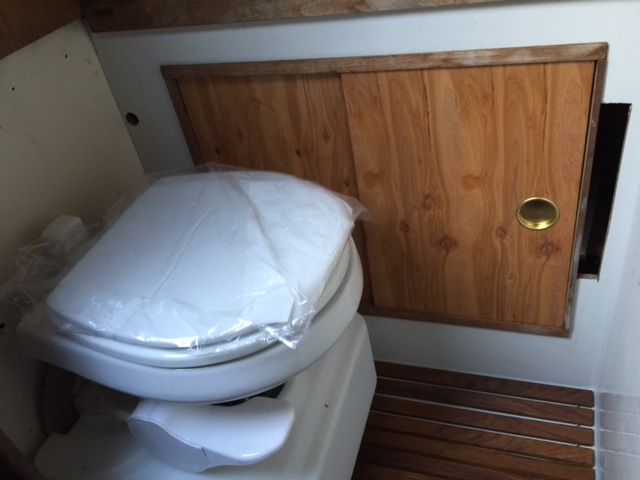 Here’s how things look with the doors installed. The next step will be to apply a few coats of polyurethane varnish to protect the doors against moisture. That’s the Sealand toilet in the foreground.
Good evening,
My wife and I are interested in getting a Nor’Sea 27’s with a center cockpit. We have been researching small cruising boat options for a long time, and the Nor’Sea seems like a good option for us. There doesn’t seem to be many for sale on the west coast, so we haven’t been able to check one out in person yet.
Have you guys been actively sailing yours? Do you like the aft cabin version?
Merry Christmas,
Michael
Central California
Hi Michael,
We love the aft cabin, but there are a few aft cockpit boats around and some owners are very enthusiastic about them. I have only been on aft cabin models but I did see an aft cockpit, I think it was at the Grand Marina.
If you haven’t already joined there are enthusiast groups on both Facebook and Yahoo Groups. The FB group is called “Nor’Sea 27 Sailing Yachts” and the Yahoo Groups mail list can be reached at https://groups.yahoo.com/neo/groups/NorSea27/info
Best regards,
Matt