The dinette table in the Catalina 27 serves the dual purpose of a table and as a fill-in support for the double berth.
Lilikoi’s dinette table is a fifty pound slab of particle board with a cherrywood veneer and nice edges on two sides. It was cobbled together by the prior owner to replace the original table that had probably gotten wet and then broken. It’s held up by a folding 2×4 leg and a couple brackets on one the outboard side. Unfortunately, it’s also prone to falling down when the boat heels or you put any weight on either of the inboard corners.
Although I am selling the boat I figured this is one annoying point that I’d like to correct before selling it. I found a table from a 30′ Coronado sailboat at a boat wrecker in Hayward. It’s 3/4″ ply with a Formica top, folding leg and a nice drawer incorporated underneath. It has nice real teak wood edging. It had approximately the 35″ fore/aft span required, but it must have been designed for a port installation, because as I learned when I took it to the boat and aligned it with on my starboard settee, it fits the hull profile almost perfectly – when it’s upside down!
I removed all the hardware from the table and inverted. It’s about 1/2″ too wide front to rear, so I’ll need to cut back a bit along one edge. If I was smart about it I could have left one edge attached and just trimmed the other! Flipping the board over it has a very good fit but I scribed along the hull edge approximately 1/4″ line that will make it fit more perfectly, and I decided in the quest for perfection to add a 2-1/2″ triangular filler piece to make the table line up with the inboard dinette edge. I guess it would have served, but I like the things I make to fit nice.
Quickest thing would have been to buy a new sheet of 3/4″ ply and cut the top, but in the spirit of this zero cost project (I already invested $50 in the table, after all) I decided to try filling it first. A half sheet of good 3/8″ ply was $22 at home depot, and I would need two to glue together.
I found a roll of Formica laminate in a nice maple wood finish for $4 and I’ll need to pick up some contact cement (spray on $12, pint $17 or half gallon for about $25. I’ll need more for the Nor’sea anyway but I may have some adhesive kicking around home. the Formica is only 30″ wide so I’ll need a seam somewhere; probably right up the middle. I also could do some old boat charts or something under a layer of acrylic, or poured epoxy, but I am selling the thing and can’t get too fancy.
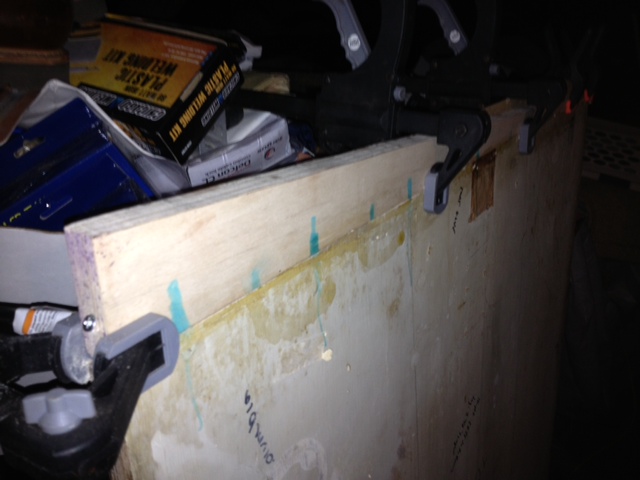
Yesterday I picked up an off-cut 3/4″ plywood scrap that’s 10″ by about six feet and I cut a wedge out of that to make the fill-in. I’ll add a cleat at the wide end (which is forward)to provide some gluing surface to ensure it stays on and screw that in with some 1-1/4″ screws I picked up today at Home Depot. I was at the boat so I cut the wedge with the Jigsaw and it came out clean enough that I believe it will be covered effectively by the teak edge.
To see what height the table would be I balanced it on its brackets and wedged up the foot until it was level abeam, (as determined with the float level that came with the TV bracket). I figure I will need a leg that is 2-7/8″ taller than the existing one. It’s just a tube, maybe even a piece of electrical conduit material with a cap on it.
Tonight I will glue it up with some water resistant glue and clamps. I need to pick up a long 4′ clamp at harbor freight or something. The 4′ clamp at Home Depot was $36 or so. Then I can trim the edges down about 3/8″ on each side and cut along the scribe line for the outside of the hull. The teak trim adds 3/8″ to each side, and I want a 1/4″ clearance to make the table easy to install.
More to come…
04/10/14 – Extending the table.
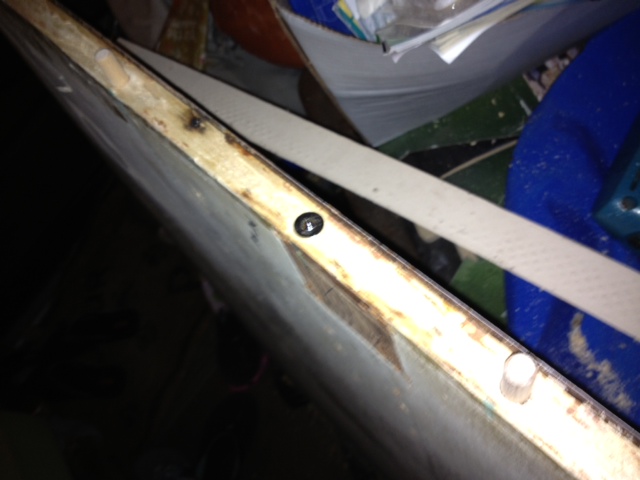
marker button (center) placed in a dowel hole can transfer the location of that hole to the mating piece.
In order to get the table shaped to the right dimensions I needed to add a 3″ extension to the forward edge, tapering down to nothing at the inboard aft edge. I found a 1″ piece of cabinet grade wood and trimmed it to size on the boat using a jigsaw. I flipped it around and used the straighter edge against the table.
Using a dowel jig I placed six 3/8″ dowels. The kit was $3 at Harbor Freight and came with the dowels, drill bit and stop, and three marking tools with small points on them. You drill three holes, pop the markers in the holes, line up the wood piece and tap the wood down, and it marks the position of the hole perfectly.
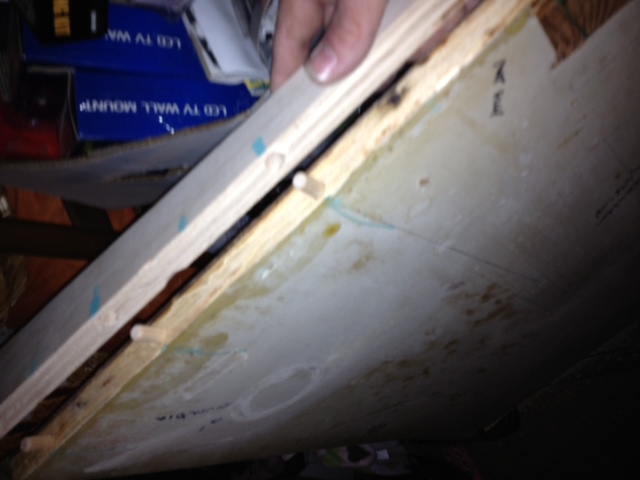
and ready for gluing
The only difficulty is making sure the holes are plumb to the surface so everything lines up properly.
I glued it up, clamped it and let it set for about 3 hours. Only then did I notice that the wood I’d glued on was upside down! I chiseled off the new piece and it was attached so strongly it removed a shimmed on piece of the edge of the table (1/2″) that I didn’t even know was there. Using the chisel I cleaned up the edge redrilled the holes and glued and clamped
Wood glue says to clamp for one hour. I left this overnight.
it again. It was 2:30 AM when I finished!
04/13/2014 – Applying the Formica Laminate
I found a piece of pine colored Formica roll at Restore for $4. It’s 75″ long and 30″ wide. I need 35″ width for the table, so there will be a seam. I decided to position the seam outboard to make it less conspicuous. cut the Formica in half with the saw with counter-rotating blades and it cut through easily, just to get two pieces the approximate size. 30×36 and 12×36.
I positioned the big piece on the able leaving about 29″ on the table and an inch overlap at the inboard edge. You need some material to cut and snap off flush. I marked the perimeter of the table on the underside of the Formica so I’d know where to apply the adhesive, and I added a line to the table to mark the limit of the area I would be gluing. Then I and plastered it up with contact cement using a cheap 5″ foam roller. I used the water base, non explosive kind. I have to say that stuff doesn’t dry as rapidly or stick as hard as the oldschool stinky kind.
After about 30 minutes the cement had dried and was just tacky to the touch. I put some dowels (actually they were bamboo skewers 36″ long from an orchid) on the table and positioned the Formica over the top. Then I removed the skewers and pressed the Formica down, rolling it with a wine bottle and rapping it with a rubber mallet. It stuck everywhere pretty well except the topmost edge, so I put some weight on that. Meanwhile I glued up the last piece and positioned it. I used a heat gun to dry the glue because it was getting cooler toward dusk. This was dried more thoroughly but it never seemed very sticky.
This piece went on more securely.
The table will need to be set about 3″ higher than before, so the pipe foot won’t be long enough. I found a chrome steel shower curtain rod at OSH for 11.99 that can be cut down to size
04/14/2014 – Trimming the laminate
I flipped the table upside down on a 1×4 and scored the edge with a utility knife blade. Then the excess material snapped off easily toward the scored edge, keeping the 1×4 tight against the table. I sanded the sharp edge lightly with some paper.
Next step is to reapply the mahogany trim pieces. Then I can remount the drawer, folding support rod and brackets.