More Head Work

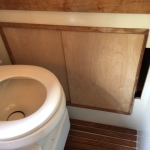
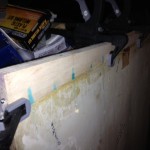
You can see the trim for the sliding panels in this photo.

You can see the trim for the sliding panels in this photo.

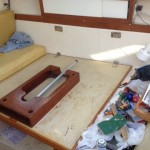
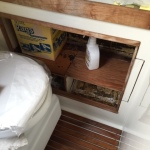
Continuing the renovation of this Nor’Sea 27’s head installation, I started work on the head locker, which consists of a 25×19″ cupboard with sliding doors.  The prior owner had begun a modification to fit a 15-gallon polyethylene holding tank on in this locker, and he removed the doors and teak trim and cut a clearance hole in the side of the locker area.  I am not sure how the weight of that tank would have worked out, but my plan is to install a Sealand M11 Marine Head with Holding Tank, so I won’t need to take up the locker with a tank.  I may install a 6 gallon water heater in there later, but it won’t be anything that big and heavy.

When I cleaned out the boat I saved all the odds and ends, and luckily, I was able to locate the both trim pieces and sliding panel guides.  One of the was slightly damaged, but I put that piece facing the away. The panel doors, however, were long gone.  I did locate the missing piece of shower pan that had been cut out, and it had a reasonable fit except for the saw kerf.  I plan to epoxy that bit back in place and fill the gap in the future.
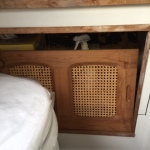
01 cane doorMy original idea was to use some teak doors with rattan insert that matched most of the rest of the boat.  I thought I could use that to create a nice sliding panel door, but I learned that the panel’s thickness was going to present some interesting challenges, because the two doors have to bypass each other, and the guide is only about an inch wide, so I abandoned that idea.  I do still like the way it looks.

I knew I definitely didn’t want some flat white sliding doors because I think that’s against the character of the boat, but I did want to get something going, so I thought I would do my best to make some serviceable doors with the intent that I could always replace the panels later if I think of a way to incorporate the rattan doors or something.

I bought some inexpensive paneling to make the doors – I spent just $7 buying some luan plywood 2×4′ piece at Home Depot, and I found some brass door inserts at OSH.

Next, I cut a test panel to make sure I would be able to get the door panels installed in the finished opening. It didn’t need to be full width just tall enough to fit and be sure it would slide freely.  The typical design for sliding bypass doors provides runners with a deeper guide on the top than the bottom guide so to be installed, the panel can be pushed up into the top slider with enough clearance to get past the bottom rails and seat into the lower channel. Then it drops down, leaving just enough height in the upper channel to retain the doors. I learned the ideal height was between 19-1/2 and 19-5/8″. The challenge was that my table saw has a 12″ width bed, so I made a remote fence using a stepstool to hold the fence in place.

04 flat install

I cut the two panels at 19-1/2 high and planned the width to have about 1″ overlap.  That made each panel 13-1/2″ wide.  I made sure to make my cuts to have the grain run vertically and use the best part of the wood.

I test fit the panels in place and it looks promising. We’re looking at what ultimately became the back of the panels.  More on that soon.
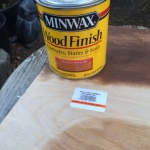
05 flat stainThe next step was to stain the panels.   A first I tried a dark stain, visible in the rear of the picture at left. It matched the teak but no one is going to be fooled into thinking that is teak.  I’m much happier with the Colonial Maple stain in the foreground than the dark teak color on the rear.I originally tested some dark stain but frankly it was not very convincing so I went with a much lighter color to capture more of a knotty maple or pecan appearance.
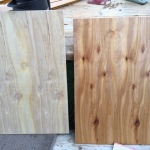
06 flat stainStained on right, unstained on left. Originally I was planning to use the boring, back side of the panel, but when the stain hit these knots, I had to go with the gorgeous figured side.
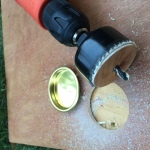


07 flat drillFinally I installed the door handles, which are closet-door style round brass inserts. It needed a 2-1/8″ hole so I made a trip to Harbor Freight, where I found a set for $10.  Not the bi-metal kind, but fine for wood.  I was careful to use a scrap of wood for a backer and cut halfway through the wood panel from each side.
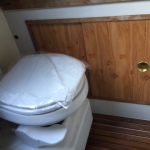


09 flat finishHere’s how things look with the doors installed.  The next step will be to apply a few coats of polyurethane varnish to protect the doors against moisture. That’s the Sealand toilet in the foreground.

 

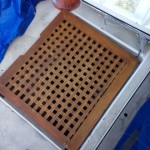
Teak floormat for the Head

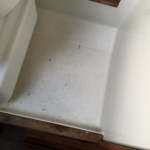
The molded in shower pan on the right is flat but slightly beveled for drainage

Seen from above: The molded-in shower pan on the right is flat but slightly beveled for drainage

The Nor’sea 27 sailboat (most models) has a fiberglass liner in the head area that has a raised molded-in platform on its aft edge for the head installation, leaving a slightly depressed section on the right as a molded-in tray. Some owners have plumbed in a handheld shower and installed a drain in the tray, which tilts to the front left edge.  I haven’t gone that far, but I thought it would be great to have a teak floor to protect the gelcoat in this area, which is prone to water and wear.

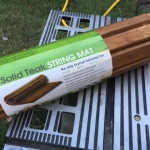
For that reason, I’ve been carrying around the rough measurements in case I ran across something promising. Roll-up String MatAt the 2013 Strictly Sail exposition in Oakland, California, I bought a teak string floormat for about $40. When rolled out flat the mat measures about 19-3/4 inches on a side, and is made of plantation teak. They’re called “string mats” but in fact, the strings are stainless steel cable on the good ones. The interesting thing is that the flexibility of the construction will lets it conform somewhat to shower pan, which isn’t exactly flat, sloping slightly up at its edge.

I located the same mat later at Bed, Bath and Beyond

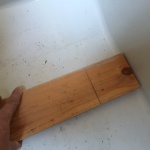
 for about $60, at retail. It’s made by WaterBrands.They also sell a rigid mat, but as it turns out, The rollup mat is the way to go. 02 test boardThe first step in any installation is to measure very carefully because, I’ve learned in the past, nothing on a boat is typically exactly what it seems. In this case the fiberglass shower pan is mostly square, but it tips up on the port side of the boat a little to meet the hull. The string mat has a advantage of being able to conform to that rise nicely.


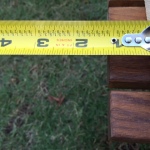
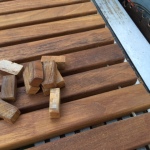
I measured 18-3/4 inches width overall and found it was consistent across the pan, but I noted that there is a slight radius to the corner edge, just about a 16th inch on each side, so I narrowed it to about 18-5/8″ The first thing I did was cut a piece a pine of that size test it out. It fit well in the middle center and top with about a 16th inch gap on either end. That’s about what I wanted; I could fit in there more perfectly if I coved the inside edge of the corner, but I do want to get a little bit of circulation around each end to help prevent rot. 03 endcutUsing the wood I trimmed as a guide, I lined it up with a mat and found that I would need to trim 1″ but because of the location of the cables just a couple inches from each end I would need to cut both ends of the mat at 1/2″ to avoid leaving one of the stainless cables too close to the end. 18 5/8 inch length was just a touch wider than my tablesaw fence could accommodate with stability so I used an extra clamp to square things up. As I cut each piece of the mat tended to kick back some with some four so I was careful to position myself out of the line of fire. 04 cutoff
Next I flipped it over and cut the other side. I was able to cut fairly cleanly without much chip out.  There were some slightly rough edges to touch up with sandpaper, but I wanted to check the fit first.


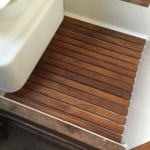
05 inplaceI went ahead and test fit the mat in the bottom of the floor pan, and actually couldn’t have had a better fit. Moving the mat left or right causes it to ride up on the 16th inch radius so it’s really happy with that kind of spacing I provided.


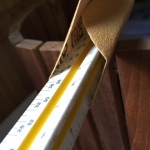
07 bevelsandNext I had to finish the ends a little bit so I wrapped a piece of adhesive sanding disk around a triangular ruler and use that to smooth the corners between pairs of the boards. I also around the edges just slightly on top and bottom those 12 boards are so makes for a lot of edges and sides.


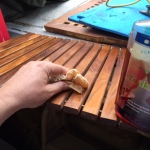
08 teak oilNext I used some teak oil and a rag to treat the newly cut surfaces. The end cuts of the boards really soak up the oil. I went ahead and gave the rest of the mat a light oiling.


10 test fit

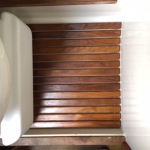
The last photo shows the mat oiled and installed in the boat. It really makes a big difference in the appearance, and the teak boards will help protect the fiberglass gelcoat from scratches.

Swap Meet at Owl Harbor

I made a trip up near Lodi on Saturday for the annual swap meet at Owl Harbor in Isleton, CA.  Unfortunately, it fell on the same day as the Opening Day in Redwood City. I made a few new friends and founds a trove of nautical goodies.

  1. A barometer and ship’s clock from Bruce Baker, both manufactured by Weems & Plath went for $80, with a wood stand.  Looking them up online it appears they’re about $800 together. The ship’s clock is electronic, but it does have a nice chime on the hour and I have it set up in the living room.  Learning the ship’s bells!
  2. An armload of boat canvas with Eisenglas for $20.  This will be handy for fooling around with the sewing machine.
  3. Lifesling cover in good condition for $4 ($34 retail)
  4. 15 hp Johnson outboard motor (short shaft) for $150.
  5. Todd Steering Console (center console for 17′ Boston Whaler) for my buddy over in Newark (free!)
  6. Fiberglass repair kit and 3 small bundles of fabric for $10
  7. Cabin door and hatch from a 1967 Chris Cract Constellation for $10 both
  8. 5 long curtains and rods for $15
  9. An aluminum Lewmar winch handle (non locking) for $7
  10. Set of LED lights for $10
  11. Halyard for $15
  12. Rucksack for $
  13. Magma Barbecue parts in new condition for a total of $25
    1. BBQ regulator ($30 retail)
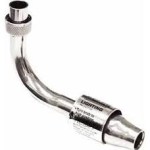
    2. Venturi Tube ($30 retail)
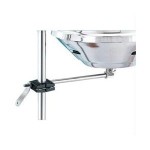
    3. Rail mount ($56 retail)
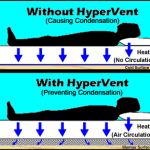
  14. A double berth of Hypervent material for underberth ventilation $10.
    1. This stuff comes in 39 inch widths for $12 per lineal foot and I have about $80 worth.
  15. 10′ of Ancor DC hookup wire for $2
  16. A pair of adjustable collapsible sawhorses $10/both (retail about $25 each at Harbor Freight)
  17. Free gas leaf blower!


Dinette Table for Catalina 27

The dinette table in the Catalina 27 serves the dual purpose of a table and as a fill-in support for the double berth.

Lilikoi’s dinette table is a fifty pound slab of particle board with a cherrywood veneer and nice edges on two sides.  It was cobbled together by the prior owner to replace the original table that had probably gotten wet and then broken.  It’s held up by a folding 2×4 leg and a couple brackets on one the outboard side. Unfortunately, it’s also prone to falling down when the boat heels or you put any weight on either of the inboard corners.

Although I am selling the boat I figured this is one annoying point that I’d like to correct before selling it. I found a table from a 30′ Coronado sailboat at a boat wrecker in Hayward.  It’s 3/4″ ply with a Formica top, folding leg and a nice drawer incorporated underneath. It has nice real teak wood edging. It had approximately the 35″ fore/aft span required, but it must have been designed for a port installation, because as I learned when I took it to the boat and aligned it with on my starboard settee, it fits the hull profile almost perfectly – when it’s upside down!

I removed all the hardware from the table and inverted.  It’s about 1/2″ too wide front to rear, so I’ll need to cut back a bit along one edge.  If I was smart about it I could have left one edge attached and just trimmed the other!  Flipping the board over it has a very good fit but I scribed along the hull edge approximately 1/4″ line that will make it fit more perfectly, and I decided in the quest for perfection to add a 2-1/2″ triangular filler piece to make the table line up with the inboard dinette edge.  I guess it would have served, but I like the things I make to fit nice.

Quickest thing would have been to buy a new sheet of 3/4″ ply and cut the top, but in the spirit of this zero cost project (I already invested $50 in the table, after all) I decided to try filling it first. A half sheet of good 3/8″ ply was $22 at home depot, and I would need two to glue together.

I found a roll of Formica laminate in a nice maple wood finish for $4 and I’ll need to pick up some contact cement (spray on $12, pint $17 or half gallon for about $25. I’ll need more for the Nor’sea anyway but I may have some adhesive kicking around home.  the Formica is only 30″ wide so I’ll need a seam somewhere; probably right up the middle.  I also could do some old boat charts or something under a layer of acrylic, or poured epoxy, but I am selling the thing and can’t get too fancy.

Yesterday I picked up an off-cut 3/4″ plywood scrap that’s 10″ by about six feet and I cut a wedge out of that to make the fill-in.  I’ll add a cleat at the wide end (which is forward)to provide some gluing surface to ensure it stays on and screw that in with some 1-1/4″ screws I picked up today at Home Depot.  I was at the boat so I cut the wedge with the Jigsaw and it came out clean enough that I believe it will be covered effectively by the teak edge.

To see what height the table would be I balanced it on its brackets and wedged up the foot until it was level abeam, (as determined with the float level that came with the TV bracket).   I figure I will need a leg that is 2-7/8″ taller than the existing one.  It’s just a tube, maybe even a piece of electrical conduit material with a cap on it.

Tonight I will glue it up with some water resistant glue and clamps.  I need to pick up a long 4′ clamp at harbor freight or something.  The 4′ clamp at Home Depot was $36 or so.  Then I can trim the edges down about 3/8″ on each side and cut along the scribe line for the outside of the hull.  The teak trim adds 3/8″ to each side, and I want a 1/4″ clearance to make the table easy to install.Lilikoi Dinette Table

More to come…


04/10/14 – Extending the table.

marker button (center) placed in a dowel hole can transfer the location of that hole to the mating piece.

marker button (center) placed in a dowel hole can transfer the location of that hole to the mating piece.

In order to get the table shaped to the right dimensions I needed to add a 3″ extension to the forward edge, tapering down to nothing at the inboard aft edge.  I found a 1″ piece of cabinet grade wood and trimmed it to size on the boat using a jigsaw.  I flipped it around and used the straighter edge against the table.

Using a dowel jig I placed six 3/8″ dowels.  The kit was $3 at Harbor Freight and came with the dowels, drill bit and stop, and three marking tools with small points on them.  You drill three holes, pop the markers in the holes, line up the wood piece and tap the wood down, and it marks the position of the hole perfectly.

and ready for gluing

and ready for gluing

The only difficulty is making sure the holes are plumb to the surface so everything lines up properly.

I glued it up, clamped it and let it set for about 3 hours.  Only then did I notice that the wood I’d glued on was upside down!  I chiseled off the new piece and it was attached so strongly it removed a shimmed on piece of the edge of the table (1/2″) that I didn’t even know was there.  Using the chisel I cleaned up the edge redrilled the holes and glued and clamped

Wood glue says to clamp for one hour.  I left this overnight.

Wood glue says to clamp for one hour. I left this overnight.

it again.  It was 2:30 AM when I finished!


04/13/2014 – Applying the Formica Laminate

I found a piece of pine colored Formica roll at Restore for $4.  It’s 75″ long and 30″ wide. I need 35″ width for the table, so there will be a seam.  I decided to position the seam outboard to make it less conspicuous.  cut the Formica in half with the saw with counter-rotating blades and it cut through easily, just to get two pieces the approximate size.  30×36 and 12×36.

I positioned the big piece on the able leaving about 29″ on the table and an inch overlap at the inboard edge. You need some material to cut and snap off flush.  I marked the perimeter of the table on the underside of the Formica so I’d know where to apply the adhesive, and I added a line to the table to mark the limit of the area I would be gluing. Then I  and plastered it up with contact cement using a cheap 5″ foam roller.  I used the water base, non explosive kind.  I have to say that stuff doesn’t dry as rapidly or stick as hard as the oldschool stinky kind.

After about 30 minutes the cement had dried and was just tacky to the touch.  I put some dowels (actually they were bamboo skewers 36″ long from an orchid) on the table and positioned the Formica over the top. Then I removed the skewers and pressed the Formica down, rolling it with a wine bottle and rapping it with a rubber mallet.  It stuck everywhere pretty well except the topmost edge, so I put some weight on that.  Meanwhile I glued up the last piece and positioned it.  I used a heat gun to dry the glue because it was getting cooler toward dusk.  This was dried more thoroughly but it never seemed very sticky.

This piece went on more securely.

The table will need to be set about 3″ higher than before, so the pipe foot won’t be long enough.  I found a chrome steel shower curtain rod at OSH for 11.99 that can be cut down to size

04/14/2014 – Trimming the laminate

I flipped the table upside down on a 1×4 and scored the edge with a utility knife blade.  Then the excess material snapped off easily toward the scored edge, keeping the 1×4 tight against the table.  I sanded the sharp edge lightly with some paper.

Next step is to reapply the mahogany trim pieces. Then I can remount the drawer, folding support rod and brackets.


A cockpit grating for Sundance

The aft cabin Nor’sea 27s have a nearly square cockpit that is often fitted with a grate that can be raised and placed in chocks to fill in the cockpit flush with the level of the seating and thereby provide some extra sleeping space.

I have had my eye out for grates and grating materials, and when I attended a boat swap meet in Berkeley last Sunday I got lucky! The sale starts at six and I was out there at 5:45 with a flashlight scoping things out.  As the third seller was unloading I found this teak cockpit grille and I was all over it.

I held my breath while I measured it up and was amazed to discover it was just about perfect – an inch longer front to back than I’d need.  It’s a few years old, but nothing some glue and clamps can’t fix.  I think it’s mahogany and not Teak, though. I won’t know for sure until I sand off the finish.

I believe the sale price was $45 trimmed just a bit from $50.  I also bought a few other items from the same seller, including a trawler lamp that needs a new glass chimney.

I’ll update this post when I get the grating cut to size and refinished.  Be sure to add to the list of things to take to the swap: cash, want list with measurements, flashlight, tape measure.

This grating was almost a perfect fit.  It has me curious which boat it came from?

Swap Meet

Gotta love the boat swaps. This is the place to stretch your boating dollars to the limit, and maybe make a few in the process.

Berkeley Yacht Club holds an annual sale in April and invites people to sell on the lawn and walkways around the marina for about $25 a space. Last year we sold and this year I found some goodies for current and future projects. I put a sample below of some items I bought:

  • Two tier fiberglass dock step – $40
  • Nicro solar vent 4″ (not battery backed) – $20
  • Well used brass Trawler lamp (no chimney or wick) – $55
  • Gill Boots size 9 – $10
  • Hand bearing compass $3
  • Newish porta potty – $10
  • Used Lifesling – $22 (two vendors were involved here. The case was $2 in fair condition and the Lifesling itself was $20 from another vendor in very good condition)
  • Folding Prop – $40.  It’s a right hand 14″ dia 12 pitch bronze prop.
  • 40 sailing books at $1 each.
  • 2 Finespray faucets.  One broken for parts $9
  • Barient two-handed winch handle (frozen open lock) $15

Take the van; get there early.  The best times to buy are right when it opens and when people are getting ready to pack up and cart stuff home.

Shore Power Wiring for Lilikoi – a Catalina 27

Getting Lilikoi ready for sale, I decided one thing that would really help the sale is adding shore power. For the last 40 years this boat has had an extension cord running through the companionway.  I figured it’s about time, and I have the parts and an electrical engineering degree, so time to do something about it.

Some adult supervision is important in any project involving electricity

Some adult supervision is important in any project involving electricity

This web photo helped me decide where to place the power entry

This web photo helped me decide where to place the power entry

Beginning with the shore power inlet, I had a plastic Marinco outlet from the wrecker for $25 and I needed to figure out where to put the inlet.

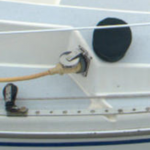
I did some research on the web and found a boat that had the inlet located below the winch.  I checked my boat out and reached under the port berth to where the screw heads are and forward to the proposed area and found it was pretty clear. The Marinco instructions call for a 2-7/8″ hole saw.  Right!  I found a 3″ saw at Harbor Freight and went to town after looking at the gasket to make sure it would cover a 3″ hole.  I taped the proposed plate location and made sure it wouldn’t interfere with winch operation.  I wasn’t sure how thick the fiberglass is at that point (turns out to be surprisingly thin at about 1/8″ and it cut through in under 3 minutes.  I had been worried that maybe I should get an expensive bimetal hole saw set, but the $10 set did the job fine.

This is the depth of the breaker.  I later cut the access out bigger to accommodate a full depth box to contain the wiring

This is the depth of the breaker. I later cut the access out bigger to accommodate a full depth box to contain the wiring

I bought a dual pole 20A breaker set for $5 at a boat wrecker (they typically cost about $100).  A trip to home depot to find some suitable wiring boxes.  The ones I chose have ears in the front and brackets that tighten against them with a couple of Philips head screws.

The wiring needs to support the size of the breaker, so I was commited then to using more costly 12gauge wire.  I decided I absolutely needed power at the Galley and near the Dinnette table (for general use, and about as far as you’d want to run a battery charger cable) It also made sense to have power at the starboard bulkhead for

An outlet in the bulkhead just outboard of the chainplate location faces the dinette and will be a convenient place to plug in TV, table lamp, chargers

An outlet in the bulkhead just outboard of the chainplate location faces the dinette and will be a convenient place to plug in TV, table lamp, chargers

the TV and another outlet up in the V berth because that is a dark and scary place.  This suggested I run two

using the cubby wall as an outlet location

using the cubby wall as an outlet location convenient to the dinette table

branches.  I drew up a quick diagram and marked the proposed locations with electrical tape.  I took full advantage of the wooden cubbies to avoid cutting holes in the fiberglass wherever possible.

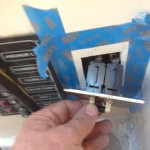
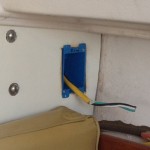
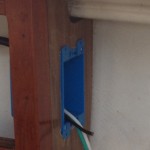
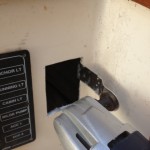
In the end I needed to only cut one hole for the shore power inlet.  one 1/2″ hole for the wiring to the breaker panel.  A rectangular hole for the breaker panel, which I positioned near the existing DC panel, one hole through the bottom of the port bench into the galley cabinet, one rectangular hole in the galley cabinet for the GCFI outlet. In a parallel run the wiring goes over to battery locker to an outlet set in the wooden cubby above the dinette, then through the dinette to the main bulkhead where I mounted a second outlet for the TV and from there through the cubby in the head area to the forward bulkhead, where I positioned the V-berth outlet.  The backs of the AC boxes are obscured within the cubbies with the outlets facing out.

Multitool can create square cutouts with zero clearance

Multitool can create square cutouts with zero clearance

I used a multitool to make the cuts, which worked great because of the limited clearances.  it would have been close to impossible to cut rectangular holes with the jigsaw

For the Galley I chose to mount the outlet in the side of the cabinetry, accessible to the kitchen without being too close to the sink.  I crimped on connectors, Trying ring connectors the first time, but getting wiser when I found the outlets’ screws don’t back out the entire way.  An auto wire stripper I found at harbor freight was very helpful.  Their crimpers aren’t great, you generally have to use the next smaller size hole (blue for yellow) for a secure connection.

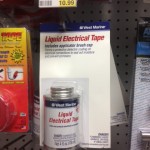
liquid electrical tape is handy for wet locations, sealing securely against moisture.

liquid electrical tape is handy for wet locations, sealing securely against moisture.

Over that I used some liquid electrical tape and then installed the outlets in the boxes and screwed on the covers.

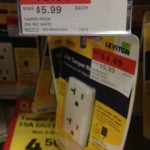
Ground Current Fault Interrupt (GCFI) outlets are required for each run. These devices monitor power through them and if more than 30mA or so takes the wrong route, (through your body and wet feet to ground, for instance) they shut off the power in a millisecond. Standard 20A outlets can be used at the other locations but they need to be wired in properly, with grounds, and tested to make sure they are GCFI protected.  I found some GCFI outlets at Orchard Supply

six bucks for a 20A GCFI outlet.  You betcha.  Gotta thank Leviton and Orchard supply.

six bucks for a 20A GCFI outlet. You betcha. Gotta thank Leviton and Orchard supply.

that were being discontinued.  Leviton had made some custom sized outlets designed to work with special décor plates that hide their screws.  They didn’t catch on because the devices are nonstandard.  the GCFI outlets were going for just $6 and their non GCFI outlets were $3 with the cover plates discounted to a buck.  That clinched the decision to install four outlets instead of two!

Repair to a Makita right angle drill

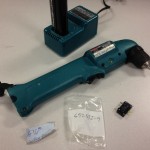
I found one of these Makita right angle drills at the Restore in San Carlos a few months ago for $16.  It came with a charger and a couple batteries.  The batteries are the older Nickel-Cadmium (NiCd) chemistry, but it so happens my wife picked up a similar straight drill at a yard sale a few months before.

Right angle drills are very useful whenever you’re doing work in close quarters, which abound on a boat.  I must have done hours of remodeling with the same model, which I used to own about 20 years ago when it came out.  As it turned out the drill didn’t turn, although the batteries charged fine.  The problem was the thermal overload relay, the little rectangular fuse with the yellow button would not reset properly and stayed pushed in all the time.

I found the part online for about six bucks, but before I placed the order I made a quick test by shorting out the two electrodes and confirming the drill ran properly.  The part came in by post sometime late last year, but I didn’t have the opportunity to get everything together to fix it. Once I did this afternoon it took about 20 minutes.  Remove the half dozen black Philips head screws from the drill, carefully separate the case halves, slide out the old thermal cutout and use a soldering iron to carefully remove the old leads and transfer them to the new part with a little finesse, a pair of pliers and a splash of new solder.

The drill is back in commission and I’m looking forward to using it for some upcoming projects, like installing the pine ceiling along the walls of the aft cabin.

Kudos to the Restore folks, by the way.  When I informed them the drill didn’t work, Jamie knocked the price of the replacement component off the bill.  I paid shipping, and we both came out ahead!

This right angle drill, circa 1982 is a handy one to have on your side in close combat!

This right angle drill, circa 1982 is a handy one to have on your side in close combat!

Flexiteek / ISITEEK

I’ve often admired the look of teak decks.  A pair of our Los Gatos Yacht Club members have a Nautor Swan 44 that has sexy grey teak running the length of the deck. Great footing and beautiful to look at but it can be some effort to maintain.  Also the concerns about the expense and weight of teak, the countless holes that might be needed to produce a sprung teak deck, and the conservation issues; it makes you re-think!

Happily, a few European manufacturers have developed some synthetic teak products. Notably, the maker of FLEXITEEK offers in addition to their full service installations where they’ll come out to measure your boat and make templates, or have you send them in.  Then they heat weld together the teak material into panels, which they’ll either install or send back to you for installation.

Practical Sailor did an evaluation of the materials from a cost and installation standpoint years ago.  Most all of them are tongue and groove installation of material just a fraction of an inch thick that is glued along the tongue and shaped into patterns that conform to the deck.  Once connected together like a puzzle, they can be glued down using mastic-ky glue to secure them to the desired locations.

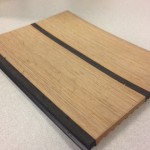
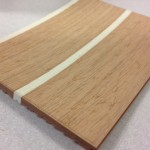
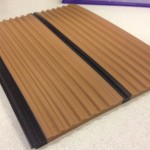
Since that time the cost of anything petroleum based has gone up pretty significantly.   I ordered some samples from the Florida-based ISITEEK distributor and show them here.  At first glance, even holding the material in your hands, it’s hard to tell it’s not wood.  Rather than just giving the surface impression of grain, there’s a fibrous texture that goes all the way through the material.  This stuff is available with two colors of “grout” lines, either dark grey or off white.  The color is a facsimile of lightly weathered teak material.  The material warranty is 5 years.

My plan is to order up about 10 square feet of the material and give it some wear and tear on the Catalina before I go crazy with the installation. I am concerned how the material holds up, whether it fades, delaminates or gets algae encrusted.


03-08-2013 Upholstery Fabric

I made a trip over to Ikea to check out some fabrics to see what would go well with the general tone of the interior.  They didn’t have any huge variety but I picked up some samples in brown, tan and off white.  I decided that the tan and off-white work very well. I  didn’t care for the browns at all.  Too dark and nasty looking.

I also took some photos of how the cushions were constructed before returning them so I would have some ideas about how to construct the new ones.  I decided I do like the top in two layers.